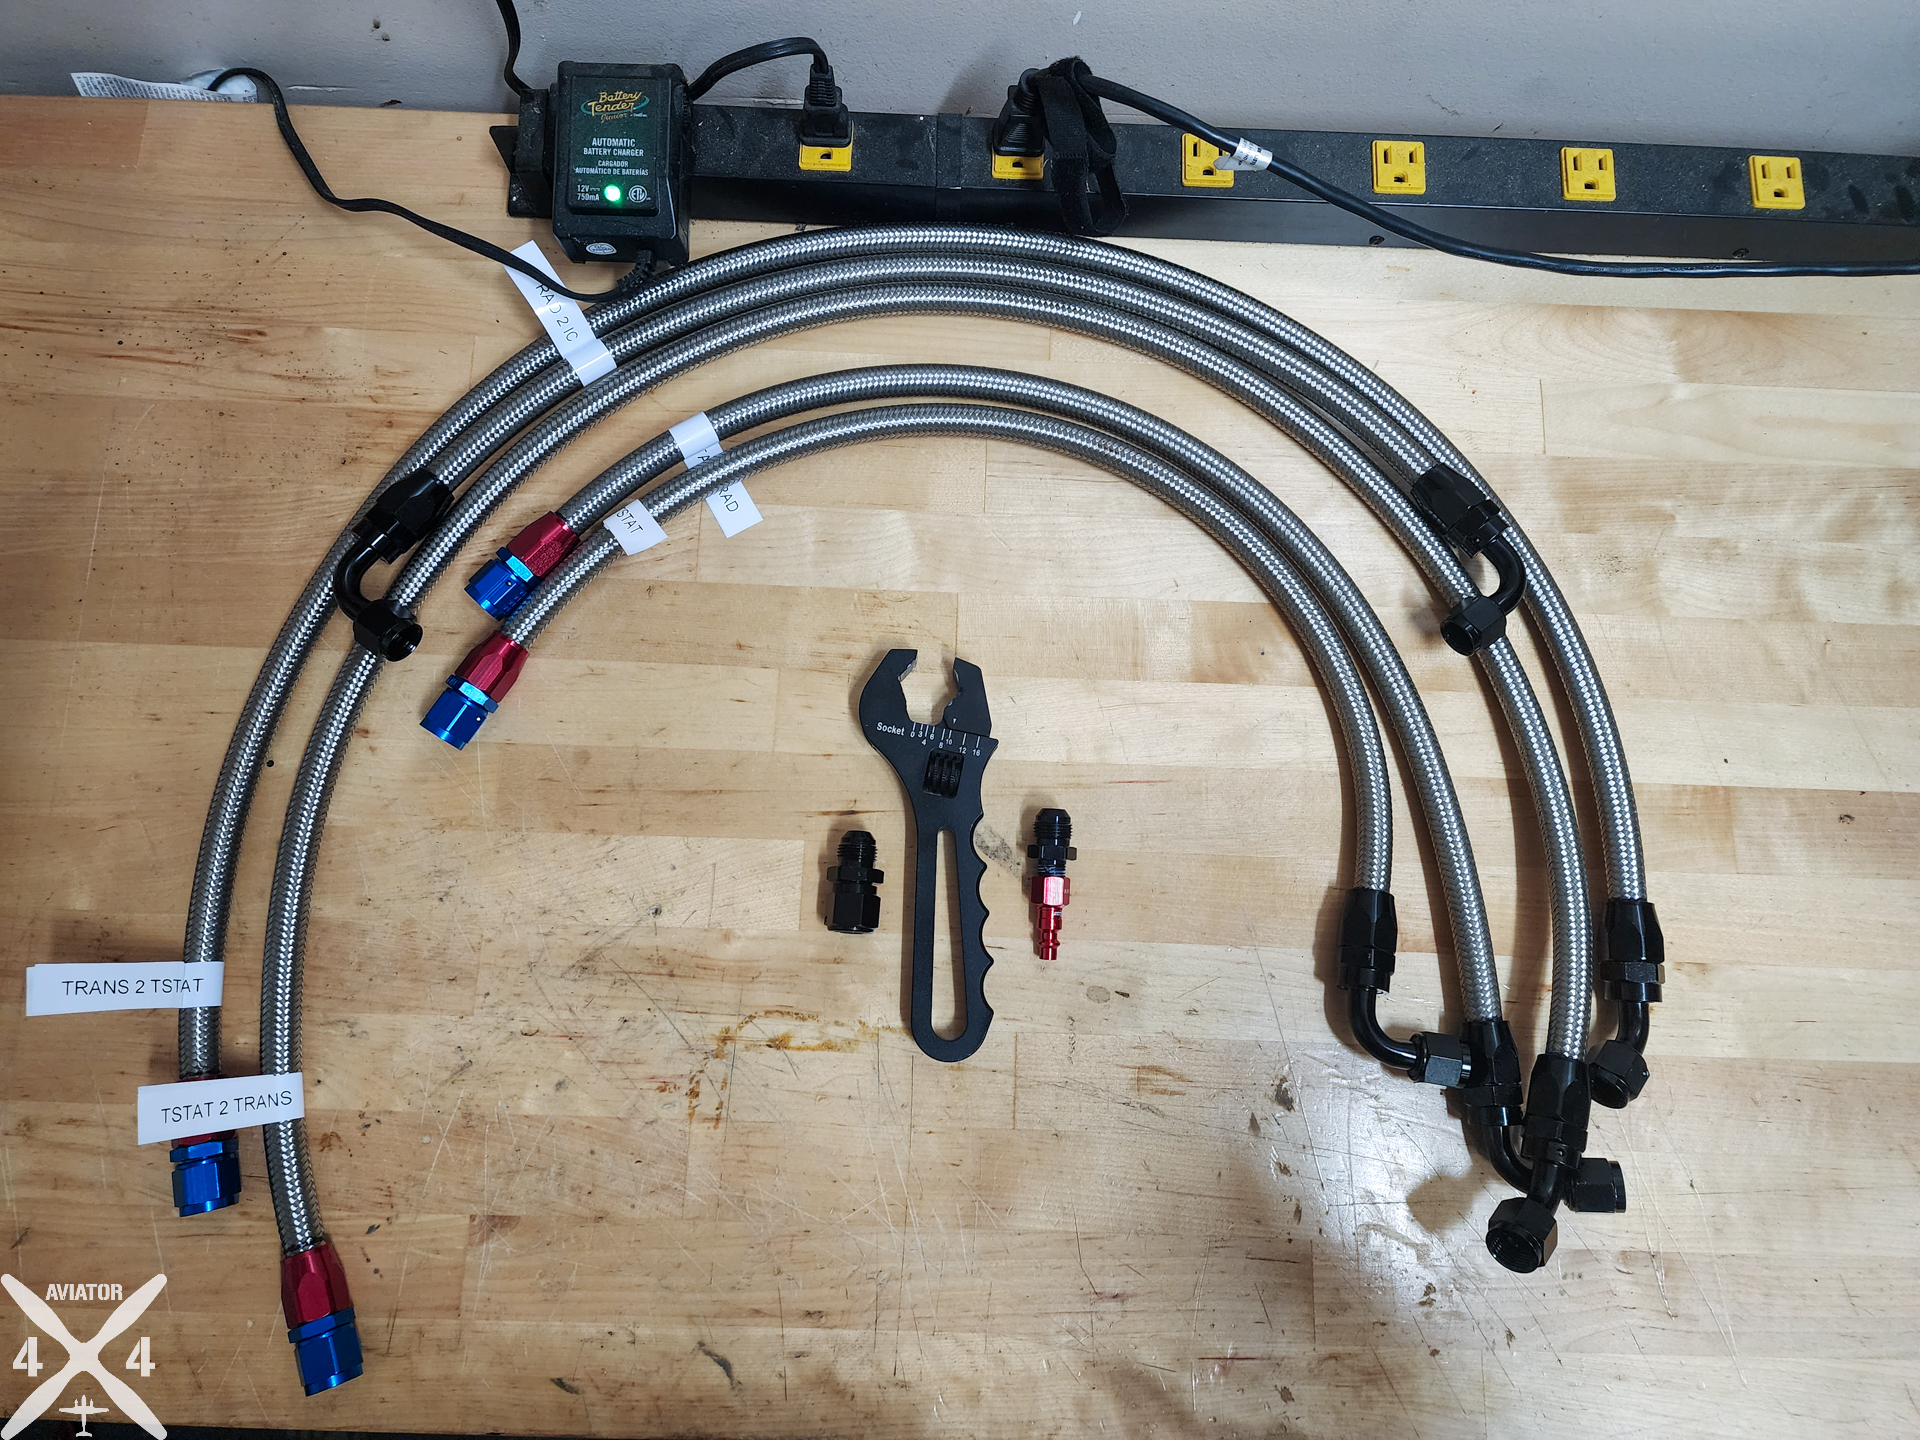
This How To Guide will cover making bespoke AN hoses in your garage with common hand tools.

Introduction
I wont go into a lengthy background on AN hoses, but basically during WW2 the many standards (or rather, lack of a consolidated single standard) made production, maintenance, and supply chain logistics for the war effort very complex. The Army and Navy (the origins of the red and blue colors, for Army and Navy respectively) decided on a standardized system of hose and fitting sizes using a 37* flare (JIC, Joint Industry Council, uses the same dimensions as AN but have less exacting tolerances).
AN hoses and fittings come in many sizes and are used in aircraft, aircraft ground equipment, hydraulic construction/manufacturing machinery, automobiles, and powersport equipment for tons of reasons. They can be professionally made with compression/crimp ends or garage made with screw on fittings (This guide focuses on the latter). AN hoses are quite popular in automobiles and powersports because they allow the fabrication of high strength, custom length, durable, versatile hoses in your garage with standardized fittings. Some common uses are fuel systems, oil/transmission/fuel coolers & intercoolers (both engine and transmission), and inline oil/fuel filters. This post is not about all the permutations of AN hoses, but generally these applications use one of two hose types (CPE or PTFE) and two common sizes (6AN or 8AN). Any of those combinations can be jacketed in stainless steel or a mesh braid.
Sizes:
- 6AN is very versatile and similar to 3/8 ID hose. Most commonly used in fullsize trucks and smaller for transmission/engine oil intercoolers and fuel lines.
- 8AN is larger, comparable to 1/2 ID hose. Among other things, 1/2ID hose is used in some thirsty V8 fuel lines or transmission intercoolers on 2500HD/F250 size trucks.
Types:
- CPE hose: Chlorinated PolyEthylene, a type of synthetic rubber reasonably compatible with most non-fuel fluids (transmission fluid, engine oil, etc…).
- PTFE lined hose: PolyTetraFluorEthylene, trademarked by DuPont as Teflon, is an incredibly resistant liner that is necessary for fuel systems in the modern era
Tools and parts list:
Disclaimer: I am not an engineer and I am not responsible for any modifications you make to the vehicle as a result of this guide. Use at your own risk/discretion.
Obligatory not affiliated with these companies, I bought all of this myself, none of it was provided to me, etc…
Time required:
Complexity:
Parts Needed:
Tools used:
Directions:
Step1: Measure
Using whatever method you prefer, measure 2-3 times. If able, my preferred method is to terminate one end of the AN hose, attach it to where it is going, route it, and mark it with a sharpie. This is the most surefire method to ensure that your custom AN hoses are the correct length, but it takes the most time and scrapes the most knuckles. If you don’t have the time to do it right the first time, when will you have the time go to back and do it again ?

Step2: Tape, Cut, and Trim
Once you have the hose measured and marked, wrap tape around the area to be cut. Wrapping/cutting through helps cut down (pun intended) on frayed ends, which we’ll clean up in the next step anyway. I used 2″ frog tape but any masking tape should work.

Make the cut with an appropriate tool. I found a cable cutter like these Klein Cable Cutters worked well enough but if you’re looking at making a lot of stainless steel hoses you might want something more like 18″ Heavy Duty Cable Cutters.
CAUTION: I DO NOT recommend the use of any kind of power tool (angle grinder, cutoff wheel, or dremel), as it will create dust inside the hose that will be difficult to clean.


After making your cut, trim the frayed wires. For stainless steel hoses, use a good pair of 8″ Diagonal Cutters. For mesh braided hoses, a a pair of flush cuts. Leaving the tape on can be helpful here, but is not necessary if you are careful not to disturb it. A ~45* works best for me.

Step3: Trim & Mark
Now that you have your hose the correct length (hopefully) and trimmed, slide the AN fitting base on the hose. To properly seat it, slide it on until the hose touches the threads, and then back off 1/16-1/8″.
Mark below the base with a sharpie so you can visually identify if the hose moved during installation of the AN fitting body.

Step4: Install body
Secure the base+hose from Step 3 in a vise (or channel locks if you’re froggy/space limited). Some full grain tooling leather makes a fantastic buffer to firmly hold the AN fitting yet not mar it with steel vise jaws or tools.

Lubricate the AN fitting body in whatever fluid will be running through the hose (for me, ATF). This makes it massively easier to install.

You’ll find a couple different styles of AN hose spigots; I like the ones that slide inside of the hose like Aeroquip of Evil Energy (on the right) but the Earl and Russell fittings (left) which capture it seal just as well but are slightly more difficult to screw on and require more pressure to hold the hose.


Once lubricated, thread the body into the hose base, firmly grasp the hose, and screw it down until it is fully seated watching the black mark you made to ensure it does not push the hose out. An aluminum AN wrench is massively helpful here and not at all gimmicky (much to my surprise).


Do not crank on the AN fitting with the strength of 100x gorillas, just firmly seat it flush against the base. If it will not screw down to the base, you more than likely have stray stainless steel fibers caught between the base and body. You will need to remove the body, pull the hose out, trim, and try again.

Step5: Label
This step can be done at any point, but if you’re making multiple hoses of different lengths, I really recommend that you label your hoses. I get a lot of use out of my DYMO Rhino 4200 Heatshrink label maker and made all of these labels with it. I feed it nothing but the finest knock-off labels and haven’t had any issues yet.

Step6: Pressure test
Using an adapter to 1/4″ NPT, some air compressor fittings, and an AN plug, pressure test all the hoses you made to at least twice the operating pressure.

To find leaks, they can either be submersed in water or sprayed with something like soapy water or simple green. I like to spray the hoses on a surface I need to clean anyway, so as not to waste. I loosened the fitting below to show what it SHOULD NOT look like:

Step7: Clean !
No matter how meticulous you were in creation of the hose, they need to be flushed. Having loose particulate in the hose could destroy transmissions, fuel pumps, etc…
- Blow compressed air through the hose from both ends.
- Pour a bit (maybe 1-2 Tbsp) of denatured alcohol through each end.
- Blow compressed air through both ends again and let the hose thoroughly dry prior to use.
Step7: Pre-fill prior to operation
Pre-filling lines is a good way to help prevent airlocking, frothy fluids, or a dramatic decrease in fluid level (depending on your hose run length). You can make a simple pre-fill widget with a Koehler RA990 Multi-Use Siphon Pump, spare 90* AN fitting, and perhaps an AN male to male coupler depending on if you’re filling hoses or intercoolers.

Lastly, this site contains affiliate links. It costs you nothing, but I receive a small percentage if you purchase using the above links. I would greatly appreciate it if you would support the site using them, but if not I also understand. Thanks for reading, and may every landing be gear down !

