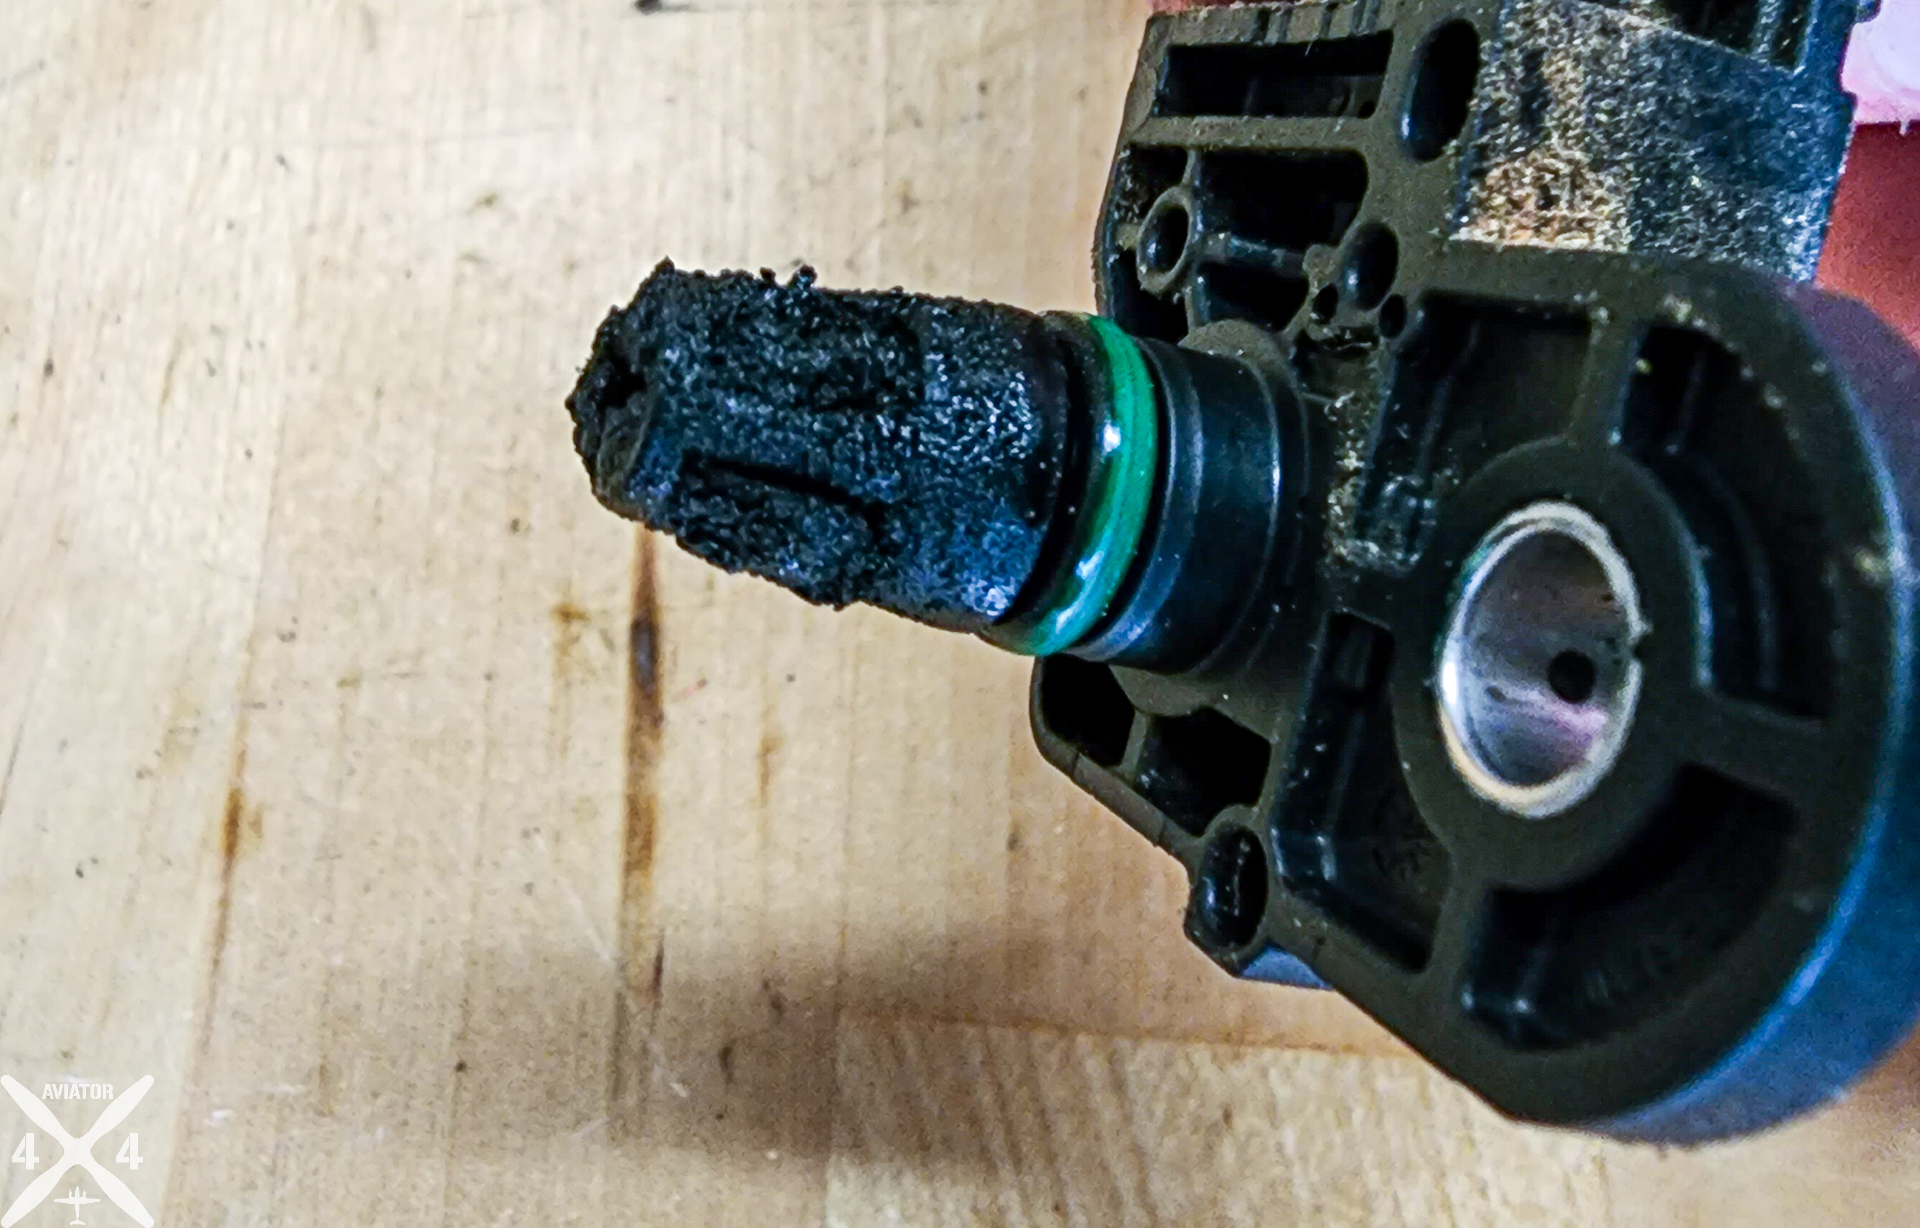
How to clean the Throttle Inlet Absolute Pressure Sensor/Manifold Absolute Pressure (MAP) sensor on the 2.8L Duramax Diesel. I recommend this be done no less than every 50k, probably every 20k if you’re not running a catch can.

At 65k, I don’t know how mine was measuring anything more than hopes and dreams. It appeared completely clogged, but I know air pressure is relative and I could see the MAF sensor measuring something in Torque Pro.
Obligatory not affiliated, I bought all of this myself, none of it was provided to me, etc…
Guide/Parts Compatibility:
While the parts and socket sizes listed are specific to my 2.8L Duramax, the process will be the same no matter what diesel engine you have.
Disclaimer:
Disclaimer: I am not an engineer and I am not responsible for any modifications you make to the vehicle as a result of this guide. Use at your own risk/discretion.
Obligatory not affiliated with these companies, I bought all of this myself, none of it was provided to me, etc…
Time Required:
- 1.0hrs
Complexity:
- 2/10
- Contributing Factors:
- Critical sensor
- Intake exposed
Parts Needed:
- None. 2.8L Duramax MAP Sensor is Bosch P/N 281006077 or GM 55568175 for reference though.
Tools Used:
- CRC Mass Air Flow Sensor Cleaner (Do not use Brake Cleaner !)
- Gearwrench Hex, Torx, Security sockets (T27 and E10)
- Absorbent polypro pad
- Thick Full Grain Tooling Leather
- My trusty ATD Saber Under Hood light (always)
Step0: Disconnect Battery Negative

Remove the battery negative with 10mm socket. Cleaning requires disconnecting a critical sensor and I’d hate for something to happen because a simple step was skipped. I put a piece of Thick Full Grain Tooling Leather between the connector and battery.
Step1: Remove engine cover/plenum/foam

- Step 1.1: Remove oil filler cap
- Step 1.2: Use a T27 Torx socket socket to remove the bolt
- Step 1.3: Lift up to release plastic cover off the ball studs (see 2nd picture below).
- Step 1.4: Remove foam from top of engine.
- Step 1.5: Put your oil filler cap back on !!!


CAUTION: PUT YOUR OIL CAP BACK ON BEFORE YOU DROP SOMETHING IN THERE.
Step2: Remove MAP sensor

- Step 2.1: Locate MAP sensor and remove the electrical connector
- Pull the red tab towards the front of the truck
- While pushing down on the black tab, pull the body of the connector towards the front of the truck. See picture below.
- Step 2.2: Use an E10 socket to remove the bolt.
- Step 2.3: Pull straight up to remove MAP sensor.


Step3: Clean sensor

Put an absorbent polypro pad or something down to catch drippings and start spraying with CRC Mass Air Flow Sensor Cleaner (Do not use Brake Cleaner !). Give it 5-10 quick sprays to knock stuff off and let it sit for a few seconds before spraying again. The jet alone was powerful enough for me to knock out the accumulated diesel grit and leave it like new.
Step4: Re-assemble
In reverse order, reinstall the MAP sensor (and engine foam/cover, if desired).
Torque specs:
- MAP Sensor Bolt: 80 in-lb
- Engine cover bolt: 89 in-lb.
I chose to remove all the foam and really like the marine/military engine look.

Full Disclosure:
I am a full disclosure person: This site contains affiliate links. It costs you nothing but I receive a small percentage if you purchase using the above links. I would greatly appreciate it if you would support the site using them, but if not I also understand. Thanks for reading, and may every landing be gear down !

