Step by step guide on how to change your spark plugs and fuel filter to keep riding mower running in top shape.

I will admit, it is long overdue for me to have performed these common maintenance items on my 2018 JD E160 with 50.5hrs on it. While I am diligent about seasonal maintenance (sharpening blades, lubricating/leveling deck, tire air pressure, and replacing the Easy Change Oil Filter), I had not changed either of these items because it didn’t occur to me. The mower was still performing very well until my original battery gave out, forcing me to spend some time tuning up the mower.
Guide/Parts Compatibility:
While the parts listed are specific to a John Deere D100, E100, or S100 series mower, the process will be the same no matter what mower you have. In fact, the engine and parts may be exactly the same since Briggs and Stratton makes a large amount of small engines for multiple OEMs (John Deere, Husqvarna, Craftsman, etc…).
Disclaimer:
Disclaimer: I am not an engineer and I am not responsible for any modifications you make to the vehicle as a result of this guide. Use at your own risk/discretion.
Obligatory not affiliated with these companies, I bought all of this myself, none of it was provided to me, etc…
Time Required:
- 0.75hrs
Complexity:
- 2/10
- Contributing Factors:
- Fuel system involved
- Removal of coverings
- Spark plugs are delicate and need to be gapped.
Parts Needed:
- 2x Champion XC92YC Spark Plugs (the JD PN MIU11020 are Champion Plugs, see Step 6.)
- JD PN AM116304 Fuel Filter (As per parts diagram), Stratton 845125 20 Micron Fuel Filter (Actual OEM), or generic 1/4″ fuel filters like GasTappers (Look identical to JD and cost 30% less). See Step 3.
Tools Used:
- Gear Wrench 3/8″ socket set
- 5/8″ Spark Plug Socket (These magnetic ones are quite helpful !)
- Feeler Gauges to gap spark plugs
- Pliers
- Compressor and blow-out tool to clean debris out of spark plug cavities and wires.
Step1: (Optional) Change Oil/Replace Air Filter
R2 the JD Easy Change Oil Filter or perform standard oil change on non-easy change models.
With the mower cool to the touch (for your sake), remove the engine air filter covering. It is a good time to clean/replace the air filter, either with a JD PN MIU11515 or actual OEM Briggs and Stratton.
Step2: Remove Old Fuel Filter


Using a pair of pliers, pinch the hose clamp together and wiggle them away from the filter to release pressure. Gently pull the hoses off of the fuel filter ends; some twisting may be helpful. Inspect fuel hoses for damage or rot.
NOTE: It may be necessary to remove one of the snap in engine coverings to access the lower clamp of the fuel filter.
Step3: Install new fuel filter


If your fuel lines are in good shape install your new fuel filter. The JD fuel filter has two barbs on the end. It is only necessary to install it over the first barb, which is the same length as the original, longer, Briggs filter.
Step4: Gently remove spark plug wires (and clean)

Firmly grasp, and pull straight back, to remove the wires from your spark plugs


They will be dirty and should be blown out/cleaned out. An automotive detailing brush should work just as well if you don’t have a compressor. I’ve switched to dry brush cleaning my 2.8L diesel with those HMPLL brushes because it seems to work just as well as wet cleaning with much less mess.
Step5: Remove old spark plugs

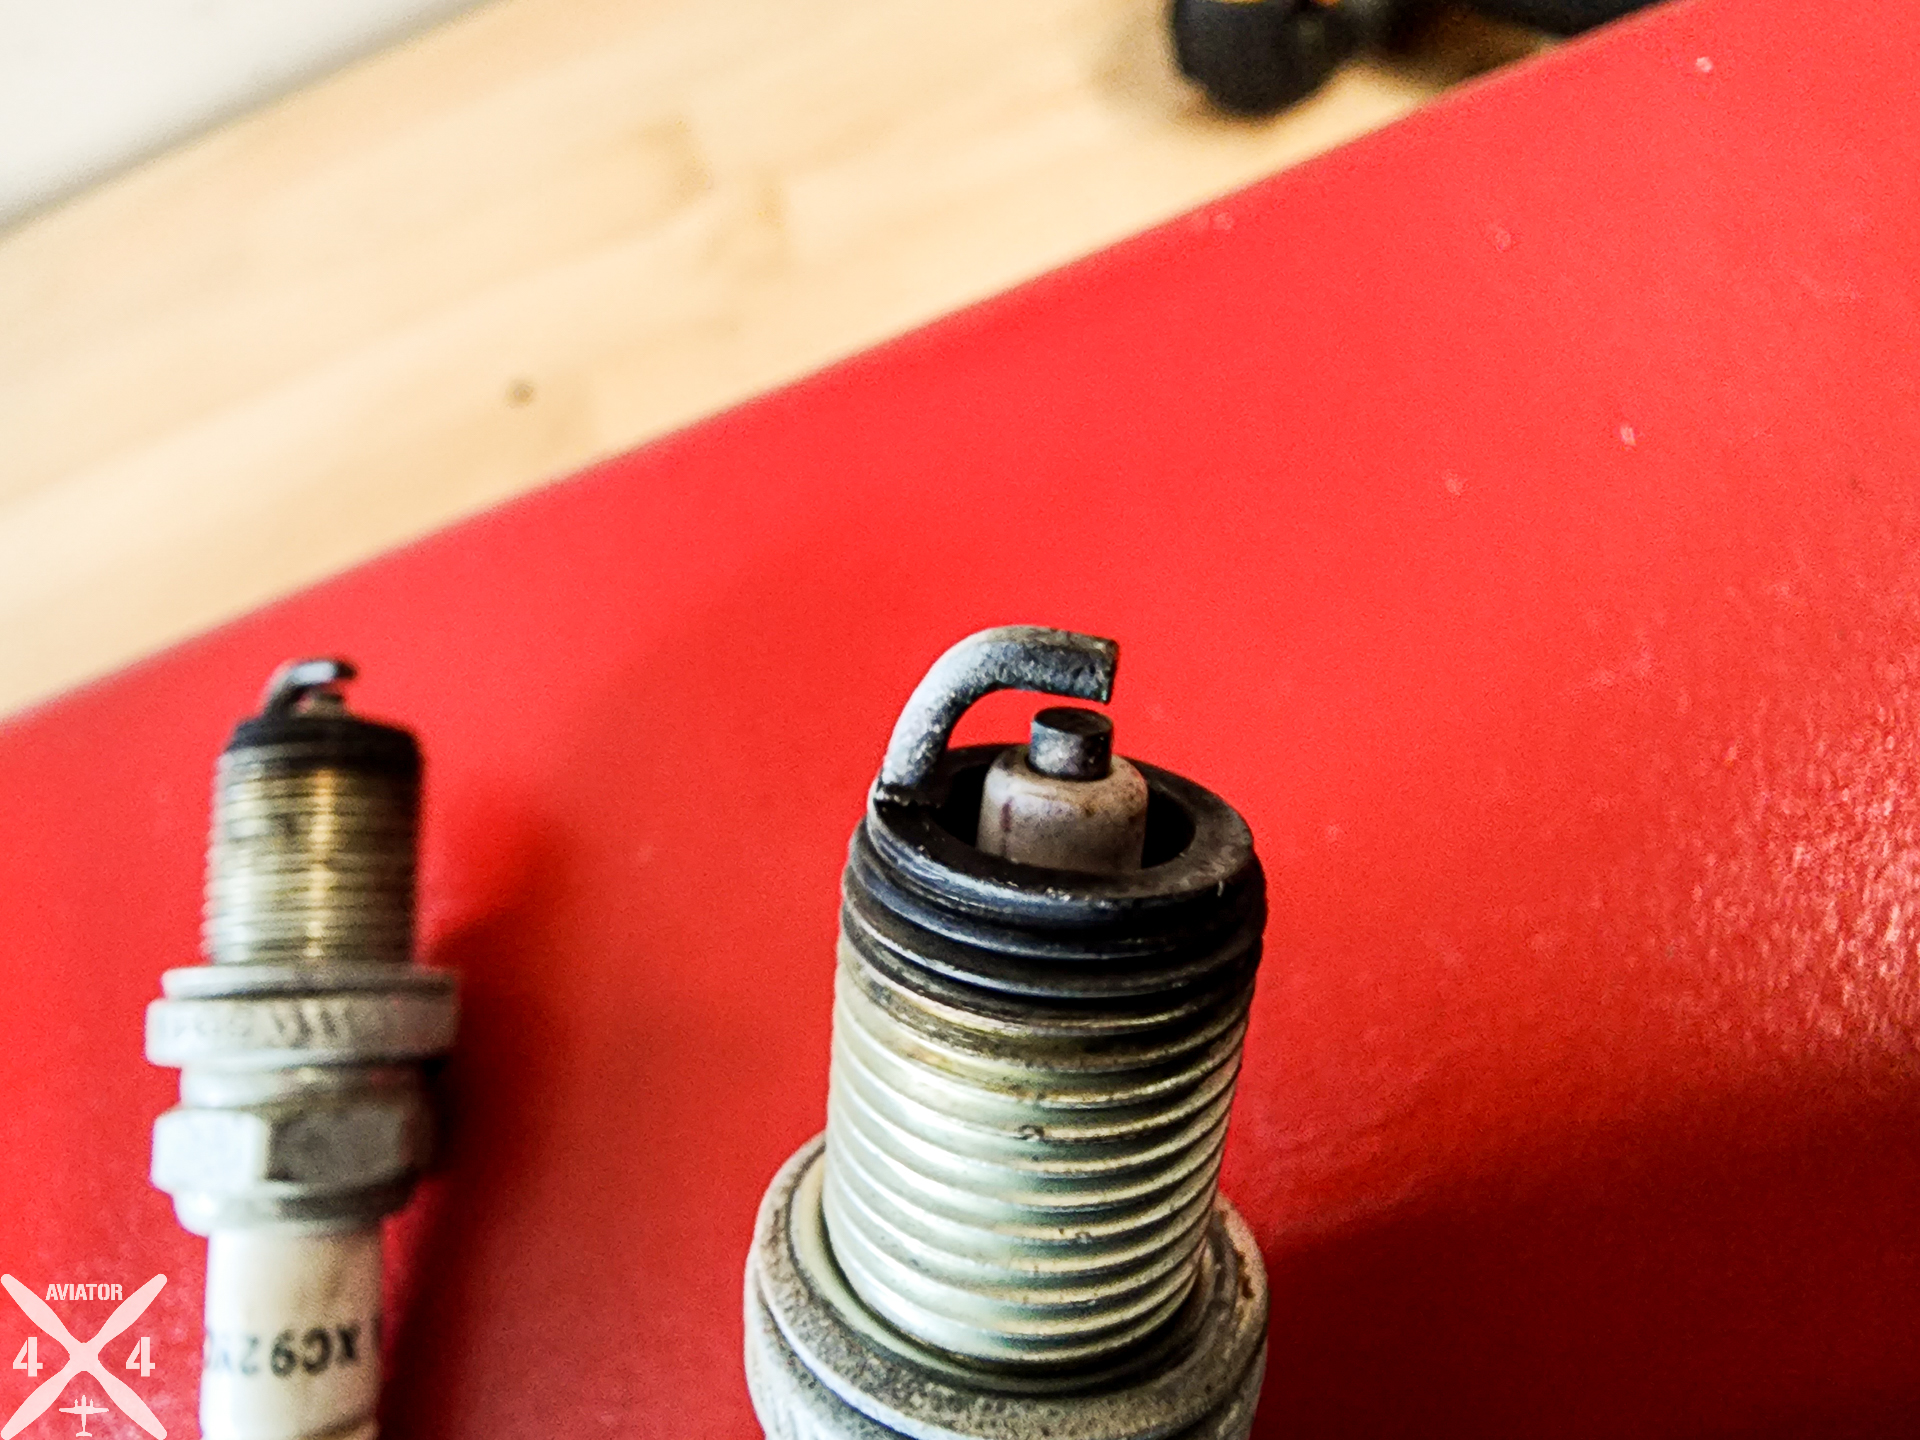
Using a 5/8″ Spark Plug Socket, remove your old plugs. It may be helpful to keep track of which one came from which side in case there is an issue (wet, caked, etc…)
Step6: Gap check old and new spark plugs

John Deere specifies a 0.030 gap for spark plugs for the E160. Check with your specific model, but this is a fairly common spec. Both of my old ones were at 0.030 (the pistons had not mechanically regapped them, thankfully). Both new ones were also at 0.030 out of the box.
Step7: Install new spark plugs
Reinstall the spark plugs in the opposite order as you removed them, being gentle not to over-torque them into the cylinder. 2-3 finger tight with a short socket wrench works well, which is ~15lb-ft or so if you’re a torque addict. The point is to tighten them until they are reasonably secure without stripping the aluminum threads or cracking the ceramic part. Don’t be a gorilla – you got this.
Step8: OpsCheck riding mower
Prior to reinstalling the covers, operations check the mower to make sure it runs. Temporarily reinstall the air filter prior to starting as normal. Be patient since it may need to prime the fuel system a bit at first.
Step 9: Reinstall covers – Done !

Lastly, this site contains affiliate links. It costs you nothing but I receive a small percentage if you purchase using the above links. I would greatly appreciate it if you would support the site using them, but if not I also understand. Thanks for reading, and may every landing be gear down !

